Blog

Your blog category

Blog

The Ultimate Guide to Ceiling Fan Direction: Stay Cool in Summer and Cozy in Winter 🌞❄️

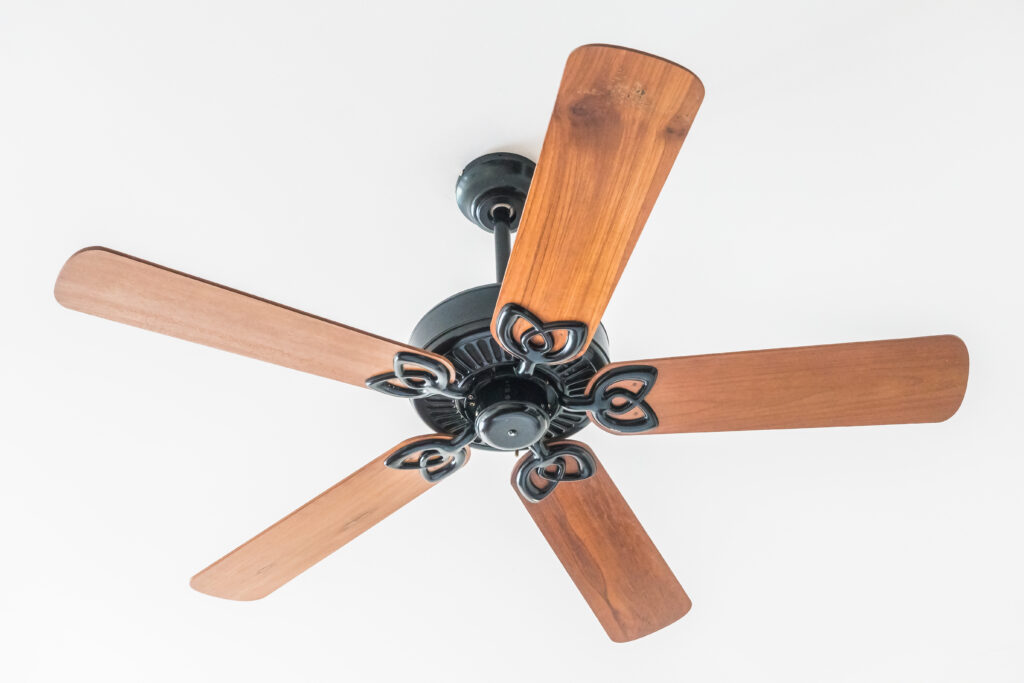
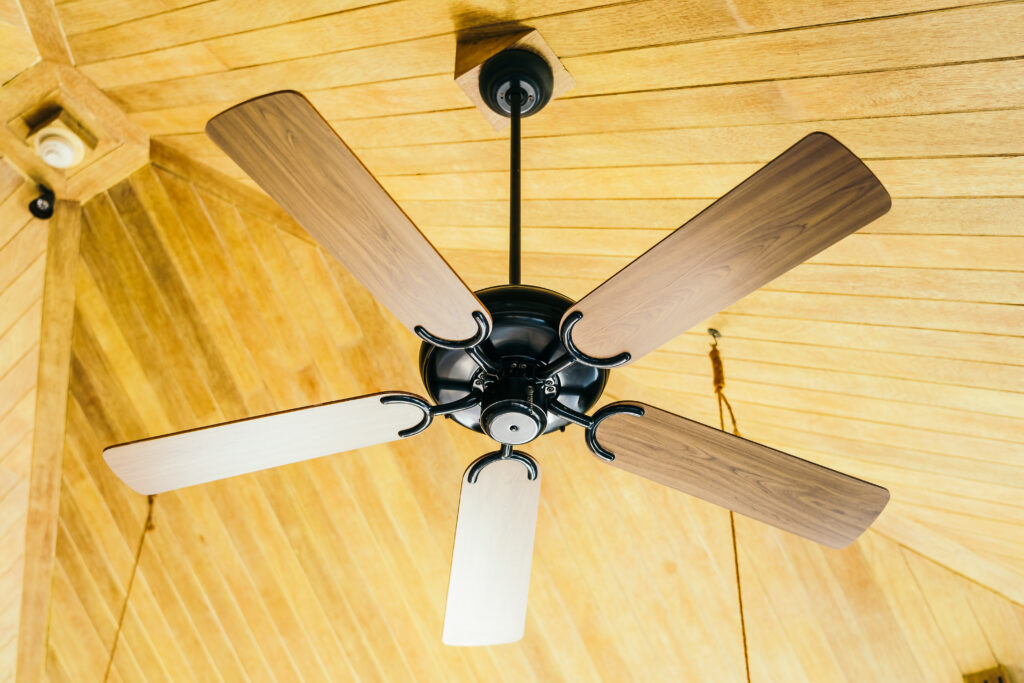
Ceiling fans are a staple in many homes, providing comfort and aiding in energy efficiency. However, not everyone knows the secret to maximizing their benefits: changing the direction of your ceiling fan based on the season. Understanding the appropriate ceiling fan direction for summer and winter can significantly enhance your home’s comfort while potentially reducing your energy bills. Let’s delve into the details of this essential home improvement tip, complete with step-by-step instructions and insights on why it matters. The Science Behind Ceiling Fan Direction 🌀 Ceiling fans don’t lower the temperature in a room; instead, they move air to create a wind-chill effect, making you feel cooler or warmer depending on the season. The direction in which the blades spin determines how the air is circulated. Summer: Counterclockwise direction (when viewed from below). Winter: Clockwise direction (when viewed from below). Ceiling Fan Direction in Summer 🌞 In the summer, you want your ceiling fan to spin counterclockwise. This direction pushes air downward, creating a breeze that evaporates sweat from your skin, making you feel cooler. This can allow you to set your thermostat a few degrees higher, saving on air conditioning costs. How to Set Your Fan for Summer Turn Off the Fan: Always start by turning off the fan and waiting for the blades to come to a complete stop. Locate the Direction Switch: Most ceiling fans have a small switch on the motor housing. Flip the Switch: Change the direction to counterclockwise. Turn the Fan Back On: Set the fan to a higher speed to maximize the cooling effect. Ceiling Fan Direction in Winter ❄️ In winter, you want your ceiling fan to spin clockwise at a low speed. This direction pulls cool air up, pushing the warm air that naturally rises to the ceiling back down into the room. This helps distribute heat more evenly and can reduce the strain on your heating system. How to Set Your Fan for Winter Turn Off the Fan: Ensure the fan is off and the blades have stopped moving. Locate the Direction Switch: Find the switch on the fan’s motor housing. Flip the Switch: Change the direction to clockwise. Turn the Fan Back On: Set the fan to a low speed to gently circulate the warm air. Benefits of Changing Ceiling Fan Direction 🌟 Energy Efficiency Adjusting your ceiling fan direction can lead to significant energy savings. By using fans to complement your heating and cooling systems, you can maintain comfort at a lower cost. Summer Savings: Running your ceiling fan counterclockwise can make a room feel up to 8 degrees cooler, allowing you to reduce air conditioning use. Winter Savings: A clockwise ceiling fan can make a room feel warmer by redistributing heated air, reducing the need for constant heating. Comfort Enhancement Summer Comfort: The breeze created by a counterclockwise fan can make hot summer days more bearable, reducing the need for air conditioning. Winter Comfort: Redistributing warm air helps eliminate cold spots in a room, making your living space more uniformly cozy. Environmental Impact Using ceiling fans effectively can reduce your reliance on HVAC systems, leading to lower energy consumption and a smaller carbon footprint. Even the smallest efforts contribute to combating climate change. Common Questions and Troubleshooting 🤔 My Fan Doesn’t Have a Direction Switch. What Should I Do? Some older or more basic ceiling fans might not have a direction switch. In this case, you can either upgrade to a new fan with this feature or use the fan in its current configuration and supplement it with other cooling or heating methods. My Fan Is Wobbling. Is This Normal? A wobbling fan can be caused by several issues, including unbalanced blades or loose screws. It’s essential to address this problem to ensure efficient operation and safety. Here’s what you can do: Turn Off the Fan: Always start by turning off the fan. Check the Blades: Ensure that all blades are secure and not warped. Tighten Screws: Check all screws and tighten them if necessary. Use a Balancing Kit: Many fans come with a balancing kit, or you can purchase one separately to balance the blades properly. How Often Should I Change the Fan Direction? You should change the direction of your ceiling fan twice a year, at the beginning of the summer and winter seasons. This ensures that you are maximizing the efficiency and comfort benefits throughout the year. Ceiling Fan Tips and Tricks 🎯 Clean Regularly: Dust and dirt can accumulate on the blades, affecting performance and air quality. Regularly clean the blades and motor housing. Use in Conjunction with AC and Heaters: Ceiling fans are most effective when used alongside your HVAC systems. In summer, a ceiling fan can allow you to set your AC higher. In winter, it helps distribute the warmth from your heater. Choose the Right Size: The size of your ceiling fan should be appropriate for the room. A fan that’s too small or too large won’t be as effective. Here’s a quick guide: Rooms up to 75 sq ft: 29-36 inch fan Rooms 76-144 sq ft: 36-42 inch fan Rooms 144-225 sq ft: 44 inch fan Rooms 225-400 sq ft: 50-54 inch fan Adjust the Speed: Higher speeds are better for the summer, while lower speeds are ideal for winter to avoid drafts. Use Multiple Fans: In larger spaces, using multiple fans can ensure even air circulation throughout the room. Conclusion 🏡 Understanding and utilizing the correct ceiling fan direction for different seasons can dramatically improve your home’s comfort and energy efficiency. By following these simple guidelines, you can enjoy a cooler summer and a warmer winter, all while saving money and reducing your environmental impact. So, the next time you flip the switch on your ceiling fan, take a moment to ensure it’s spinning in the right direction. Your comfort, wallet, and the planet will thank you!

Blog

Stay Cool and Save Energy: The Right Ceiling Fan Direction for Summer 🌀🌞

When the summer heat rolls in, keeping cool without blasting the air conditioner can be a challenge. Ceiling fans are a cost-effective and energy-efficient way to help maintain a comfortable indoor environment. However, many people don’t realize that the direction in which a ceiling fan spins can make a significant difference in comfort and efficiency. In this blog, we’ll dive into the importance of ceiling fan direction for summer, how to set your fan correctly, and some additional tips to maximize your comfort and savings. The Science Behind Ceiling Fan Direction 🌬️🔬 Ceiling fans work by moving air around a room. The direction of the blades determines whether the fan is pushing air down or pulling it up. This airflow can help with temperature regulation in your home. Here’s how it works: Summer Mode (Counterclockwise): In the summer, your ceiling fan should spin counterclockwise. This direction creates a wind-chill effect, where the breeze makes you feel cooler by evaporating moisture from your skin. It doesn’t actually lower the room’s temperature but makes it feel cooler, allowing you to set your air conditioner to a higher temperature and save on energy costs. Winter Mode (Clockwise): In the winter, the fan should spin clockwise at a low speed. This direction pulls cool air up and pushes the warm air that naturally rises back down into the room, helping to distribute heat more evenly. Knowing this, let’s focus on how to set your ceiling fan for optimal summer comfort. How to Set Your Ceiling Fan Direction for Summer 🔄☀️ Turn Off the Fan: Before changing the direction of your ceiling fan, make sure it is turned off. This is a crucial safety step to avoid injury. Locate the Direction Switch: Most ceiling fans have a small switch on the motor housing just below the blades. This switch reverses the direction of the blades. Flip the Switch: Move the switch to set the fan to spin counterclockwise for the summer. Turn the Fan Back On: After adjusting the switch, turn the fan back on to its desired speed. You should feel a cool breeze when standing directly under the fan. Test the Direction: To confirm it’s spinning the right way, stand directly beneath the fan and watch the blades. They should be rotating counterclockwise, and you should feel a strong breeze. Benefits of Correct Ceiling Fan Use in Summer 🌡️💡 Using your ceiling fan correctly in the summer can bring several benefits: Enhanced Comfort: The wind-chill effect created by the fan can make you feel up to 4 degrees cooler, which can be a game-changer during those sweltering summer days. Energy Savings: By using your ceiling fan to create a cooling effect, you can set your thermostat 4 degrees higher without reducing comfort. This can result in considerable energy savings and reduced electricity costs. Reduced Strain on Air Conditioners: Ceiling fans can help distribute cool air more evenly throughout the room, reducing the workload on your air conditioner and potentially extending its lifespan. Environmentally Friendly: Lowering your energy consumption reduces your carbon footprint, making ceiling fans an eco-friendly choice for climate control. Additional Tips for Maximizing Ceiling Fan Efficiency 🌟💨 While setting your ceiling fan to the correct direction is crucial, there are other tips to ensure you get the most out of your ceiling fan: Optimal Fan Speed: Use a higher speed for maximum cooling effect during hot summer days. However, adjust the speed to lower settings when you’re not in the room or during cooler times of the day to save energy. Fan Size Matters: Ensure your ceiling fan is appropriately sized for the room. A small fan in a large room won’t be as effective, and a large fan in a small room might create too much airflow. Here’s a quick guide: Rooms up to 75 sq. ft.: 29-36 inch fans Rooms 76-144 sq. ft.: 36-42 inch fans Rooms 144-225 sq. ft.: 44-inch fans Rooms 225-400 sq. ft.: 50-54 inch fans Placement and Height: Install your ceiling fan about 8-9 feet above the floor for optimal airflow. If your ceilings are higher, consider fans with longer down rods to ensure proper height. Use with Air Conditioning: Use your ceiling fan in conjunction with your air conditioner for maximum efficiency. The fan helps distribute the cooled air more evenly, allowing you to set the thermostat higher. Regular Maintenance: Keep your ceiling fan blades clean to ensure efficient operation. Dust and dirt can hinder airflow and make the fan work harder. Ceiling Fan Features to Consider for Summer Comfort 🛠️🏡 When shopping for a new ceiling fan or upgrading your existing one, consider features that enhance summer comfort: Energy Star Rated: Look for Energy Star-rated fans that use less energy and are more environmentally friendly. Remote Control: A remote control or wall control can make it easier to adjust fan settings without getting up. Reversible Motor: Ensure the fan has a reversible motor so you can easily switch between summer and winter modes. Lighting: Fans with integrated lighting can provide both air circulation and illumination, saving space and adding convenience. Smart Fans: Some modern ceiling fans come with smart features that allow you to control them via smartphone apps, voice assistants, or automated schedules. Ceiling Fan Myths Debunked 🧐❌ There are a few common myths about ceiling fans that need debunking: Fans Cool Rooms: Ceiling fans don’t actually cool the air; they create a wind-chill effect that makes you feel cooler. Always turn off fans when you leave the room to save energy. Higher Speed Equals Better Cooling: While higher speeds can create a stronger breeze, they’re not always necessary. Adjust the speed based on your comfort and room size. One Direction Fits All: As mentioned earlier, ceiling fans should rotate counterclockwise in the summer and clockwise in the winter for maximum efficiency. Conclusion: Stay Cool and Save with the Right Ceiling Fan Direction 🌟❄️ Understanding and utilizing the correct ceiling fan direction can significantly enhance your summer comfort and help you

Blog

The Ultimate Guide to Ceiling Fan with Light 🌟

Ceiling fans have been a staple in homes for decades, providing a practical and cost-effective way to stay cool. But in recent years, they’ve evolved beyond just cooling to become stylish and multi functional additions to our homes. One of the most popular innovations is the ceiling fan with integrated lighting. This guide will walk you through everything you need to know about ceiling fan with light, from benefits and types to installation tips and maintenance. Why Choose a Ceiling Fan with Light? 🤔 Dual Functionality: Light and Cool One of the most significant advantages of ceiling fans with lights is their dual functionality. Instead of having separate fixtures for lighting and cooling, you get both in one unit. This can be especially beneficial in rooms where space is limited or in minimalist designs where less clutter is more. Energy Efficiency 💡 Ceiling fans with lights are generally more energy-efficient than using an air conditioner and separate light fixtures. Modern ceiling fans often come with LED lights, which consume less power and have a longer lifespan compared to traditional bulbs. This can help you save a substantial amount on your electricity bills. Style and Aesthetics 🎨 Ceiling fans with lights come in a wide range of styles, finishes, and designs. Whether you prefer a modern, sleek look or a more traditional, rustic feel, there’s a ceiling fan with a light to match your décor. They can act as a statement piece in your room, adding both functionality and a touch of style. Space-Saving Solution 🏠 In smaller rooms or apartments, having a ceiling fan with an integrated light can save valuable space. It eliminates the need for additional floor or table lamps, making the room feel less cluttered and more spacious. Types of Ceiling Fans with Lights 🌀 Standard Ceiling Fans with Lights These are the most common type and can be found in various sizes and styles. They usually have multiple light bulbs and are ideal for providing general illumination in living rooms, bedrooms, or dining areas. Low-Profile Ceiling Fans with Lights These fans, often referred to as ‘hugger’ or ‘flush mount’ fans, are designed for rooms with low ceilings. They sit closer to the ceiling, making them a great choice for spaces where a standard fan might be too large or hang too low. Dual Motor Ceiling Fans with Lights For a more unique and striking look, dual motor ceiling fans feature two adjustable fan heads. These are great for large spaces or open floor plans, offering both a distinctive appearance and enhanced airflow. Outdoor Ceiling Fans with Lights Designed to withstand the elements, outdoor ceiling fans with lights are perfect for patios, porches, or gazebos. They are built with weather-resistant materials and can handle moisture and varying temperatures. Smart Ceiling Fans with Lights 🌐 With the rise of smart home technology, many ceiling fans now come with smart features. These fans can be controlled via smartphone apps, voice commands, or even integrated with home automation systems like Amazon Alexa or Google Home. Choosing the Right Ceiling Fan with Light 🛒 Room Size and Fan Size When selecting a ceiling fan, it’s crucial to consider the size of the room. A fan that’s too small won’t circulate air effectively, while one that’s too large can be overwhelming. Small Rooms (up to 75 sq. ft.): 29-36 inch fan Medium Rooms (76-144 sq. ft.): 36-42 inch fan Large Rooms (145-225 sq. ft.): 44-50 inch fan Great Rooms (over 225 sq. ft.): 50-54 inch fan Light Output Think about the primary function of the light. Do you need it to provide bright, general illumination, or are you looking for something more ambient? Check the lumens and the type of light bulbs the fan uses. LED lights are highly recommended for their efficiency and longevity. Style and Finish Consider the overall style of your home. Modern fans often have sleek, metallic finishes, while traditional ones might feature wood blades and ornate designs. Select a fan that matches your current decor. Controls and Features Decide how you want to control your ceiling fan. Options include pull chains, wall switches, remote controls, and smart home integration. Additional features like reversible motors (for seasonal use) and adjustable speed settings can also enhance the functionality of your fan. Installation Tips 🛠️ Safety First Before beginning the installation, make sure to switch off the power at the circuit breaker. Verify with a voltage tester that no electrical current is present in the wires. Proper Mounting Make sure the electrical box in the ceiling is rated for fan support. Ceiling fans are heavier than regular light fixtures and require a sturdy, properly mounted electrical box. Follow Instructions Each ceiling fan will come with its specific installation instructions. Follow these carefully to ensure a secure and proper installation. If you’re not comfortable with electrical work, it might be best to hire a professional electrician. Balancing the Blades After installing your ceiling fan, check to see if the blades are balanced. Unbalanced blades can cause wobbling and reduce the fan’s efficiency. Most fans come with balancing kits to help you with this process. Maintenance Tips for Longevity 🧹 Regular Cleaning Dust and dirt can accumulate on the blades, affecting both the fan’s performance and the quality of light. Clean the blades and light fixtures regularly with a soft cloth. Check for Loose Screws Over time, the screws that hold the fan together can become loose due to the fan’s vibration. Periodically check and tighten any loose screws to ensure the fan remains secure and stable. Replace Light Bulbs If your ceiling fan uses traditional light bulbs, replace them as soon as they burn out. For LED lights, keep an eye on their performance and replace them if you notice a significant dimming. Lubricate Moving Parts Some ceiling fans may require occasional lubrication of the motor or other moving parts. Refer to the manufacturer’s instructions for guidance on this. Seasonal Maintenance Take advantage of the reversible motor feature on many

Hampton Bay Ceiling Fan
Blog

Stay Cool this Summer with Hampton Bay Ceiling Fans 🌞💨

Summer is upon us, and as the temperatures rise, staying cool becomes a top priority. One of the best ways to beat the heat without cranking up the air conditioning is by using a ceiling fan. If you’re a proud owner of a Hampton Bay ceiling fan, you’re in luck! These fans are not only stylish and efficient but also equipped with features that can help you stay comfortable all year round. In this blog, we’ll dive into why the direction of your ceiling fan matters in the summer and how to set your Hampton Bay fan to optimize your comfort. 🌬️🏡 Why Ceiling Fan Direction Matters Ceiling fans are designed to rotate in different directions for different seasons. This simple adjustment can make a significant difference in your comfort and energy efficiency. In the summer, the goal is to create a wind-chill effect that makes you feel cooler. Let’s explore the science behind this: Wind-Chill Effect : When the fan blades rotate in the correct direction, they create a breeze that evaporates sweat from your skin, making you feel cooler without actually lowering the room’s temperature. Energy Efficiency : Using your ceiling fan effectively can help reduce your reliance on air conditioning, leading to lower energy bills. By optimizing the fan’s direction, you can keep your thermostat at a higher setting while still maintaining comfort. In which direction should your ceiling fan spin during the summer? For the summer months, your Hampton Bay ceiling fan should rotate counterclockwise. This direction pushes air downwards, creating a cooling breeze. Here’s how you can check and adjust the direction of your fan: Turn On the Fan: Start by turning on your ceiling fan at a low speed. Observe the Blade Movement: Stand directly under the fan and look up. If the blades are moving counterclockwise, they should be pushing air down, creating a noticeable breeze. Adjust if Necessary: If the fan is not rotating counterclockwise, you’ll need to switch its direction. Most Hampton Bay ceiling fans have a small switch on the motor housing that allows you to change the direction. Turn off the fan and flip the switch to adjust the rotation. Benefits of Setting Your Fan to the Correct Direction Using your Hampton Bay ceiling fan correctly in the summer offers several benefits: Improved Comfort : The cooling breeze created by the fan can make you feel up to 4 degrees cooler. Energy Savings : By relying more on your ceiling fan and less on your air conditioning, you can save on energy costs. Extended AC Lifespan : Reducing the load on your air conditioning system can extend its lifespan, saving you from costly repairs or replacements. Tips for Maximizing Your Hampton Bay Ceiling Fan’s Efficiency To get the most out of your Hampton Bay ceiling fan this summer, consider these additional tips: Use in Conjunction with Air Conditioning 🌡️: Set your thermostat a few degrees higher and let your ceiling fan help circulate the cool air. This can maintain comfort while reducing energy consumption. Fan Speed Matters 🚀: Use higher speeds on particularly hot days. Hampton Bay fans typically have multiple speed settings, so adjust as needed. Room Size and Fan Size 📏: Ensure your ceiling fan is appropriately sized for the room. A fan that is too small won’t be effective, and a fan that is too large may create excessive airflow. Regular Maintenance 🔧: Clean your fan blades regularly to ensure optimal performance. Dust can accumulate and affect airflow, so a quick wipe down every few weeks can make a big difference. Strategic Placement 🛋️: If you have multiple ceiling fans, use them strategically to enhance airflow throughout your home. Position them in the rooms where you spend the most time. Choosing the Right Hampton Bay Ceiling Fan If you’re in the market for a new ceiling fan, Hampton Bay offers a wide range of options to suit different styles and needs. Here are a few popular models to consider: Hampton Bay Glendale 52-Inch Ceiling Fan 🌟: This model is a great choice for medium to large rooms. It features a classic design, three-speed settings, and a reversible motor. Hampton Bay Hawkins 44-Inch Ceiling Fan 🏠: Ideal for smaller spaces, the Hawkins fan is compact yet powerful. It also includes a light kit, making it a functional addition to any room. Hampton Bay Industrial 60-Inch Ceiling Fan 🏢: For larger areas like living rooms or open-plan spaces, the Industrial fan offers powerful airflow and a sleek, modern design. Installation Tips Installing a Hampton Bay ceiling fan is a straightforward process, but here are some tips to ensure a smooth installation: Safety First 🛡️: Turn off the power at the circuit breaker before starting the installation. Follow the Instructions 📚: Hampton Bay fans come with detailed installation manuals. Adhere to these guidelines closely for optimal outcomes. Seek Help if Needed 🤝: If you’re not comfortable with electrical work, consider hiring a professional to assist with the installation. Conclusion Setting your Hampton Bay ceiling fan to the correct direction in summer is a simple yet effective way to stay cool and save energy. By rotating counterclockwise, your fan will create a refreshing breeze that enhances your comfort and reduces your reliance on air conditioning. Combine this with proper maintenance and strategic use, and you’ll enjoy a cool, comfortable home all summer long. Remember, the key to staying cool is not just about having the right tools but using them effectively. So, flip that switch, adjust your fan’s direction, and enjoy the benefits of a perfectly optimized Hampton Bay ceiling fan! 🌞💨🏡 Do you have any tips or experiences with using ceiling fans in the summer? Share them in the comments below! We’d love to hear from you. 😊

Harbor Breeze Ceiling Fan
Blog

Discover the Magic of Harbor Breeze Ceiling Fan: Comfort, Style, and Efficiency 🌀✨

When it comes to home comfort and design, few elements combine utility and aesthetics as seamlessly as a ceiling fan. Among the plethora of options available, Harbor Breeze ceiling fan stand out for their exceptional blend of performance, style, and affordability. Whether you’re looking to enhance your living room, bedroom, or outdoor patio, Harbor Breeze has a fan that fits your needs perfectly. In this blog, we’ll delve into what makes Harbor Breeze ceiling fan a top choice for homeowners and how they can transform your living space into a haven of comfort and elegance. 🌟🏡 Why Choose Harbor Breeze? 🤔 Versatility and Variety Harbor Breeze offers a wide range of ceiling fans, catering to diverse tastes and requirements. From sleek modern designs to classic, rustic looks, there’s a fan to match every interior decor style. You can find fans with different blade lengths, materials, and finishes, ensuring that you get the perfect fit for your room’s aesthetics. Modern Designs: For a contemporary touch, consider models like the Harbor Breeze Mazon, which features a minimalist design with sleek lines and integrated LED lighting. Traditional Styles: If you prefer a more classic look, the Harbor Breeze Armitage with its elegant bronze finish and reversible blades is a great choice. Energy Efficiency Ceiling fans are known for their energy-saving benefits, and Harbor Breeze Ceiling fans are no exception. Numerous models have earned the ENERGY STAR certification, indicating they adhere to rigorous energy efficiency standards established by the U.S. Environmental Protection Agency. By opting for an energy-efficient ceiling fan, you can reduce your electricity consumption and lower your utility bills, all while keeping your home comfortable. Tip: Pair your ceiling fan with your HVAC system to maximize energy savings. In the summer, set the fan to rotate counterclockwise to create a cooling breeze, and in the winter, reverse the direction to push warm air down from the ceiling. Ease of Installation and Maintenance Harbor Breeze ceiling fans are designed with the homeowner in mind, making installation and maintenance straightforward and hassle-free. Most models come with detailed instructions and all the necessary hardware, allowing you to set up your fan without the need for professional help. Quick Installation: With features like the Quick Install system, you can have your fan up and running in no time. This system simplifies the wiring process and secures the fan to the ceiling with minimal effort. Low Maintenance: Harbor Breeze Ceiling fans are built to last, with durable materials and finishes that resist wear and tear. Regular cleaning and occasional lubrication of the motor will keep your fan operating smoothly for years. Innovative Features Modern Harbor Breeze ceiling fans come packed with innovative features that enhance functionality and convenience. From remote controls to smart home integration, these fans are designed to meet the demands of contemporary living. Remote Control: Many models include a remote control, allowing you to adjust the fan speed and lighting without leaving your seat. Smart Technology: Some Harbor Breeze fans are compatible with smart home systems like Google Home and Amazon Alexa, giving you the ability to control your fan with voice commands or through a smartphone app. Popular Harbor Breeze Models 🏆 Harbor Breeze Mazon 44-in Brushed Nickel Flush Mount Ceiling Fan 🏅 The Mazon is a favorite among homeowners looking for a modern, compact ceiling fan. With its sleek brushed nickel finish and integrated LED light, the Mazon adds a touch of sophistication to any room. Its 44-inch blade span makes it ideal for small to medium-sized spaces. Key Features: Integrated LED light kit Three-speed reversible motor Remote control included Flush mount design for low ceilings Harbor Breeze Twin Breeze II 74-in Oil-rubbed Bronze Outdoor Ceiling Fan 🌳🌞 For those seeking a stylish and functional outdoor ceiling fan, the Twin Breeze II is an excellent choice. With its double fan design and oil-rubbed bronze finish, this fan not only looks great but also provides powerful airflow, making it perfect for patios, decks, and other outdoor areas. Key Features: Dual fan heads for maximum airflow Damp-rated for outdoor use Reversible motor Remote control compatible Harbor Breeze Armitage 52-in Bronze Indoor Ceiling Fan Models🌟🛋️ The Armitage is a versatile and affordable option that suits various indoor settings. Its classic design with reversible blades allows you to choose between a walnut or oak finish, making it easy to match your existing decor. Key Features: Reversible motor for year-round comfort Three-speed settings Light kit adaptable Easy installation Installation Tips and Tricks 📝 Although installing a ceiling fan may appear challenging, it can be a feasible DIY task with the proper method. Here are some tips and tricks to help you begin the installation process: Preparation is Key 🛠️ Turn Off the Power: Always ensure the power is turned off at the circuit breaker before starting the installation to avoid any electrical hazards. Gather Your Tools: You’ll need a ladder, screwdriver, pliers, wire stripper, and a voltage tester. Follow the Instructions 📜 Read the Manual: Each Harbor Breeze fan comes with a detailed instruction manual. Carefully review it before starting the installation. Step-by-Step Process: Follow the installation steps in the manual carefully. If you’re unsure about any step, consider watching online tutorials or seeking help from a knowledgeable friend. Secure the Fan Properly 🔩 Mounting Bracket: Ensure the mounting bracket is securely attached to the ceiling joist. This will provide a stable foundation for your fan. Wiring: Connect the wires according to the instructions, using wire nuts to secure the connections. Verify the connections to confirm they are snug and secure. Test the Fan ✅ Check Functionality: Once the fan is installed, turn the power back on and test the fan. Ensure it operates smoothly at all speeds and that the light (if included) works correctly. Balance the Blades: If you notice any wobbling, use the balancing kit provided to adjust the blades and achieve a smooth operation. Maintenance Tips for Longevity 🧹🛡️ To keep your Harbor Breeze ceiling fan in optimal condition, regular maintenance is

low profile ceiling fan
Blog

The Ultimate Guide to Low Profile Ceiling Fan: Sleek, Efficient, and Space-Saving ✨

Introduction: What Are Low Profile Ceiling Fans? When it comes to home comfort, ceiling fans play a crucial role in maintaining a pleasant environment. Nevertheless, ceiling fans vary in quality. For homes with lower ceilings, traditional ceiling fans may not be practical or safe. This is where low profile ceiling fans, also known as flush mount or hugger ceiling fans, come into play. These fans are designed to be installed directly against the ceiling, making them perfect for rooms with ceilings less than 8 feet high. In this comprehensive guide, we’ll delve into everything you need to know about low profile ceiling fans, from their benefits and design options to installation tips and maintenance advice. Why Choose a Low Profile Ceiling Fan? 🌬️ Space-Saving Design Low profile ceiling fans are ideal for rooms with limited space. Their compact design ensures that they do not hang down too far, providing ample headroom and reducing the risk of accidents. This makes them a perfect fit for bedrooms, attics, basements, and other spaces with low ceilings. Enhanced Safety Safety is a significant consideration, especially in homes with children or taller individuals. Low profile ceiling fans eliminate the danger of someone accidentally hitting their head on a low-hanging fan, ensuring a safer environment for all household members. Aesthetic Appeal These fans come in various styles, finishes, and designs, allowing homeowners to choose a fan that complements their interior decor. From modern and sleek to classic and elegant, there’s a low profile ceiling fan to suit every taste and aesthetic preference. Energy Efficiency Ceiling fans are known for their energy-saving benefits. They can help circulate air, making a room feel cooler in the summer and warmer in the winter, which can reduce the need for excessive air conditioning or heating. Low profile ceiling fans are no exception and can contribute to lower energy bills. Key Features to Look for in a Low Profile Ceiling Fan 🛠️ Blade Size and Material The size and material of the blades can significantly impact the fan’s performance and noise level. Larger blades can move more air, making them suitable for bigger rooms, while smaller blades are ideal for smaller spaces. Materials such as wood, plastic, and metal each have their own pros and cons in terms of durability, noise, and aesthetics. Motor Quality A high-quality motor is essential for efficient operation and longevity. Look for fans with durable, energy-efficient motors that offer quiet performance. DC motors are particularly popular for their energy efficiency and silent operation. Lighting Options 💡 Many low profile ceiling fans come with integrated lighting, which can be a great addition to any room. When choosing a fan with lights, consider the type of bulbs used (LED, CFL, or incandescent), the brightness, and whether the lights are dimmable. Control Mechanisms Modern ceiling fans offer various control options, including pull chains, wall controls, and remote controls. Smart fans that can be controlled via smartphone apps or voice commands are also available, providing convenience and flexibility. Reversible Blades Reversible blades allow you to change the direction of the fan’s rotation. In the summer, blades should spin counterclockwise to create a cooling breeze, while in the winter; they should spin clockwise to circulate warm air trapped near the ceiling. Top Low Profile Ceiling Fan Brands 🌟 Hunter Fan Company Hunter is a well-known brand with a long history of producing high-quality ceiling fans. Their low profile models are praised for their durability, performance, and stylish designs. Minka-Aire Minka-Aire offers a range of contemporary and traditional ceiling fans. Their low profile fans are known for their sleek aesthetics and innovative features, such as smart controls and energy-efficient motors. Westinghouse Westinghouse provides a variety of affordable ceiling fans that do not compromise on quality. Their low profile options are designed to be both functional and stylish, making them a popular choice for budget-conscious consumers. Emerson Emerson fans are renowned for their craftsmanship and reliability. Their low profile models come in a range of styles and finishes, ensuring there’s an option for every decor style. Installation Tips for Low Profile Ceiling Fans 🔧 Measure Your Ceiling Height Before purchasing a low profile ceiling fan, measure your ceiling height to ensure the fan will fit comfortably and safely. Most low profile fans are designed for ceilings less than 8 feet high. Choose the Right Location Select a central location in the room for optimal air circulation. Ensure there are no obstacles like beams or light fixtures that could interfere with the fan’s operation. Use the Right Tools Having the correct tools on hand, such as a ladder, screwdriver, and wire stripper, can make the installation process smoother. To ensure proper installation, closely follow the manufacturer’s instructions. Secure the Mounting Bracket The mounting bracket must be securely attached to a ceiling joist or another sturdy structure to support the weight of the fan. Double-check the stability of the bracket before proceeding with the fan installation. Connect the Wiring Safely ⚡ Turn off the power to the room before working with any electrical components. Connect the fan’s wiring to the existing ceiling wiring according to the manufacturer’s instructions, and secure all connections with wire nuts. Maintenance Tips for Longevity 🧹 Regular Cleaning Accumulation of dust and dirt on the fan blades can impact performance and air quality. Regularly clean the blades with a soft cloth or duster to keep them free from debris. Tighten Screws and Bolts Over time, screws and bolts can become loose due to the fan’s movement. Periodically check and tighten all fasteners to ensure the fan remains secure and operates smoothly. Lubricate Moving Parts Some ceiling fans may require occasional lubrication to maintain quiet operation. Refer to the manufacturer’s instructions for guidance on lubricating the fan’s moving parts. Inspect the Motor Listen for any unusual noises coming from the motor, which could indicate a problem. If the fan becomes excessively noisy, it may be time to replace the motor or seek professional maintenance. Popular Design Trends in Low Profile Ceiling

Ceiling fan direction
Blog

The Ultimate Guide to Ceiling Fan: Comfort, Style, and Efficiency

Ceiling fans are a staple in homes around the world, offering a blend of comfort, style, and efficiency. Whether you’re looking to stay cool in the summer, circulate warm air in the winter, or simply add a touch of elegance to a room, ceiling fans are a versatile and practical choice. In this guide, we’ll explore everything you need to know about ceiling fans, from their history to installation tips, and how to choose the perfect fan for your space. 🌬️ A Brief History of Ceiling Fans Ceiling fans have been around for over a century, with their origins tracing back to the late 19th century. The first ceiling fans were powered by water and later by electricity. They became popular in the United States in the early 20th century, particularly in the South, where they provided much-needed relief from the heat. Today, ceiling fans are found in homes, offices, and public spaces worldwide, appreciated for their ability to improve air circulation and enhance comfort. How Ceiling Fans Work Ceiling fans work by rotating blades, which create a breeze that cools the skin through evaporation. This can make a room feel several degrees cooler, allowing you to set your thermostat higher and save on air conditioning costs. In the winter, ceiling fans can be reversed to push warm air down from the ceiling, improving heating efficiency. This dual functionality makes ceiling fans a valuable addition to any home. Benefits of Using Ceiling Fans Energy Efficiency Ceiling fans are incredibly energy-efficient, using much less electricity than air conditioners. By using a ceiling fan in conjunction with your HVAC system, you can reduce your energy consumption and lower your utility bills. Improved Comfort ️ Ceiling fans can make a room feel cooler in the summer and warmer in the winter, enhancing overall comfort. The gentle breeze created by a ceiling fan can also help reduce humidity, making it feel more comfortable on hot, sticky days. Stylish Design Modern ceiling fans are available in a wide range of designs, materials, and finishes, making it easy to find one that matches your home decor. From sleek, contemporary designs to classic, rustic styles, there’s a ceiling fan to match every aesthetic. Enhanced Lighting Many ceiling fans come with built-in lights, providing both illumination and air circulation in one fixture. This can be especially useful in rooms with limited ceiling space. Types of Ceiling Fans Standard Ceiling Fans Standard ceiling fans are the most common type, featuring a central motor and multiple blades. They are available in a range of sizes and styles to suit different room sizes and decor preferences. Low-Profile Ceiling Fans Also known as hugger or flush-mount fans, low-profile ceiling fans are designed for rooms with low ceilings. They sit closer to the ceiling, providing ample airflow without taking up too much space. Dual Motor Ceiling Fans Dual motor ceiling fans feature two adjustable fan heads, allowing for greater airflow customization. They are ideal for large rooms or spaces with unique airflow needs. Energy Star Ceiling Fans Energy Star ceiling fans are designed to meet strict energy efficiency guidelines set by the U.S. Environmental Protection Agency. They use advanced motors and blade designs to provide maximum airflow with minimal energy consumption. Outdoor Ceiling Fans Outdoor ceiling fans are built to withstand the elements, with weather-resistant materials and finishes. They are perfect for patios, porches, and other outdoor living spaces. How to Choose the Right Ceiling Fan Room Size and Ceiling Height 📏 The size of the room and the height of the ceiling will determine the size and type of ceiling fan you need. For large rooms, choose a fan with a blade span of 52 inches or more. For smaller rooms, a blade span of 42 inches or less is usually sufficient. Make sure to check the recommended ceiling height for the fan you choose to ensure optimal performance. Style and Design 🎨 Consider the style and design of your room when choosing a ceiling fan. Look for a fan that complements your decor and adds to the overall aesthetic. From modern to traditional, there are countless designs to choose from. Motor Quality 🛠️ The quality of the motor is crucial for the performance and longevity of your ceiling fan. Look for fans with high-quality, durable motors that operate quietly and efficiently. Features and Functionality 🔄 Consider what additional features you want in a ceiling fan. Some fans come with remote controls, adjustable speeds, reversible motors, and integrated lighting. Determine which features are most important to you and choose a fan that meets those needs. Energy Efficiency 🌍 If energy efficiency is a priority, look for Energy Star-rated ceiling fans. These fans are designed to use less energy while providing excellent performance. Installation Tips and Safety Choose the Right Location 📍 Ensure the fan is installed in the center of the room for optimal airflow. If installing in a bedroom, make sure the fan is positioned over the bed for maximum comfort. Follow Manufacturer Instructions 📜 Always follow the manufacturer’s instructions for installation. If you’re not comfortable installing the fan yourself, consider hiring a professional electrician. Use Proper Mounting Hardware 🔩 Make sure to use the proper mounting hardware for your ceiling type. For heavy fans, use a ceiling joist or a fan-rated electrical box. Check for Balance ⚖️ After installation, check that the fan is balanced and doesn’t wobble. A balanced fan will operate more quietly and efficiently. Regular Maintenance 🧹 Keep your ceiling fan clean and dust-free to ensure optimal performance. Periodically check the screws and connections to make sure they are tight and secure. Ceiling Fan Maintenance Tips Clean the Blades Regularly 🧼 Dust and dirt can accumulate on the blades, affecting the fan’s performance. Clean the blades regularly with a soft cloth and a mild cleaner. Tighten Screws and Connections 🔧 Over time, screws and connections can loosen. Check them periodically and tighten as needed to prevent wobbling and noise. Lubricate the Motor 🛢️ If your ceiling

Liquid Electrical Tape
Blog

A Deep Dive into Liquid Electrical Tape: The Ultimate Guide 🛠️

Liquid electrical tape is a fantastic tool for both professionals and DIY enthusiasts alike. This versatile product offers a unique solution to many electrical and sealing challenges. Unlike traditional electrical tape, liquid electrical tape provides a durable, flexible, and waterproof coating that adheres to a variety of surfaces. In this comprehensive guide, we’ll explore what liquid electrical tape is, their benefit, applications, and how to use it effectively. By the end of this blog, you’ll understand why liquid electrical tape is a must-have in your toolkit. What is Liquid Electrical Tape? 🧪 Liquid electrical tape is an air-dry, synthetic rubber coating that can be brushed or sprayed onto electrical connections and components. It forms a protective layer that insulates and seals out moisture, dirt, and other contaminants. Available in various colors, it offers flexibility and durability, making it ideal for a wide range of applications. Key Characteristics: Insulating Properties: Provides excellent electrical insulation. Waterproof: Creates a waterproof seal to protect against moisture. Durability: Resistant to abrasion, chemicals, and UV light. Flexibility: Remains flexible even in extreme temperatures. The Benefits of Liquid Electrical Tape 🌟 Liquid electrical tape offers several advantages over traditional electrical tape and other sealing methods. Here are some key benefits: Superior Insulation Liquid electrical tape provides a continuous, uniform coating that eliminates gaps and overlaps, ensuring superior insulation. This makes it ideal for protecting electrical connections from short circuits and electrical shocks. Waterproof Seal One of the standout features of liquid electrical tape is its waterproofing ability. Once dried, it forms a watertight seal that protects electrical connections from moisture, which is particularly useful in marine, automotive, and outdoor applications. Flexibility and Durability The rubberized coating remains flexible and does not crack or peel, even in extreme temperatures. It can withstand a wide range of environmental conditions, including exposure to chemicals and UV light. Easy Application Liquid electrical tape is easy to apply with a brush, dip, or spray. It conforms to irregular shapes and hard-to-reach areas that traditional tape cannot effectively cover. Versatility Available in multiple colors, liquid electrical tape can be used for color-coding wires and components. It adheres to a variety of surfaces, including metal, plastic, and rubber. Applications of Liquid Electrical Tape 🛠️ Liquid electrical tape is used in a variety of industries and applications. Electrical Insulation Liquid electrical tape is primarily used to insulate electrical connections. It provides a protective barrier that prevents electrical shorts and shields connections from environmental factors. Marine Applications In marine environments, electrical components are frequently exposed to moisture and saltwater. Liquid electrical tape is ideal for sealing and protecting these components, ensuring reliable performance and longevity. Automotive Repairs In the automotive industry, liquid electrical tape is used to protect wiring and connections from dirt, moisture, and vibrations. It’s especially useful for sealing splices and repairs in wiring harnesses. Home Repairs For DIY enthusiasts, liquid electrical tape is a handy tool for a variety of home repairs. It can be used to seal and insulate outdoor lighting, repair frayed cords, and protect connections in garden equipment. Industrial Applications In industrial settings, liquid electrical tape is used to protect electrical connections and components from harsh conditions. It’s commonly used in manufacturing plants, chemical processing facilities, and construction sites. How to Use Liquid Electrical Tape: Step-by-Step Guide 📝 Using liquid electrical tape is straightforward, but following the correct procedure ensures optimal results. Here’s a step-by-step guide: Step 1: Prepare the Surface Clean the surface thoroughly to remove any dirt, grease, or moisture. A clean surface guarantees improved adhesion and a more efficient seal. Step 2: Apply the Tape Stir the liquid electrical tape well before use. Use a brush, dip, or spray to apply a generous coating to the desired area. Ensure that the coating is even and covers the entire surface. Step 3: Allow to Dry Let the first coat dry for about 10-15 minutes. Liquid electrical tape dries to the touch quickly, but complete curing takes longer. Apply more coats as necessary, letting each coat dry before adding the next one. Step 4: Inspect and Test Once fully cured, inspect the coated area to ensure complete coverage and no gaps. Test the electrical connection to ensure it is properly insulated and functioning correctly. Tips for Best Results 🌟 To get the most out of your liquid electrical tape, consider these tips: Multiple Coats For the best protection, apply multiple coats of liquid electrical tape. Each additional coat increases the durability and insulation properties of the final layer. Avoid Over-Application While multiple coats are beneficial, avoid applying too much at once. Over-application can lead to drips and uneven coverage. It’s preferable to apply multiple thin coats rather than a single thick one. Use in Well-Ventilated Areas Liquid electrical tape emits fumes while drying so make sure well-ventilation. Wearing a mask is also recommended, especially when using a spray application. Store Properly Store liquid electrical tape in a cool, dry place with the lid tightly closed. Proper storage extends the shelf life and maintains the quality of the product. Common Myths and Misconceptions 🚫 There are a few myths and misconceptions about liquid electrical tape. Let’s clear them up: Myth 1: Liquid Electrical Tape is Only for Professionals While professionals widely use liquid electrical tape, it’s also perfect for DIY enthusiasts. Its ease of use makes it accessible to anyone needing to insulate and protect electrical connections. Myth 2: Liquid Electrical Tape is Permanent Liquid electrical tape forms a durable seal, but it can be removed if necessary. It’s not a permanent solution, making it suitable for temporary repairs and adjustments. Myth 3: It’s the Same as Traditional Electrical Tape Liquid electrical tape offers different advantages compared to traditional electrical tape. While both provide insulation, liquid electrical tape offers superior sealing properties and flexibility. Safety Considerations ⚠️ Using liquid electrical tape requires some safety precautions: Avoid Skin Contact Avoid direct contact with the skin. If it gets on your skin, wash it off as early as possible with soap

white electrical tape
Blog

Exploring White Electrical Tape: A Comprehensive Guide 🛠️

When it comes to electrical work, the right tools and materials make all the difference. Among these, electrical tape is an indispensable item in any toolkit. While many people are familiar with the classic black electrical tape, white electrical tape offers unique advantages and applications. In this comprehensive guide, we’ll delve into the details of white electrical tape, exploring its uses, benefits, and best practices. By the end of this blog, you’ll have a thorough understanding of why white electrical tape deserves a spot in your toolbox. What is White Electrical Tape? 🧵 White electrical tape, like its black counterpart, is a type of pressure-sensitive tape used for insulating electrical wires and other materials that conduct electricity. It is made from a blend of polyvinyl chloride (PVC) and other components, providing flexibility, durability, and excellent insulation properties. The key difference, of course, is its color, which opens up a range of additional uses and benefits. Key Characteristics: Insulating Properties: Excellent electrical insulation to prevent short circuits and electrical shocks. Visibility: The white color makes it highly visible, useful for color-coding and marking. Durability: Resistant to abrasion, moisture, and various chemicals. Flexibility: Stretches easily to conform to irregular shapes and surfaces. The Benefits of White Electrical Tape 🌟 White electrical tape offers several advantages over traditional black tape and other colors. Here are some key benefits: Enhanced Visibility The white color of this tape makes it highly visible, which is particularly useful in dark or cluttered environments. This visibility can be crucial for safety and ease of identification. Ideal for Color-Coding White electrical tape is perfect for color-coding wires and components. It stands out well against most backgrounds, making it easy to identify specific circuits or connections. Versatility in Applications Beyond its primary use in electrical insulation, white electrical tape is often used for labeling, bundling cables, and even in arts and crafts projects. Its clean appearance also makes it suitable for visible repairs. Reflective Properties In some applications, white electrical tape can be used for its reflective properties. For instance, it can help improve visibility in low-light conditions or be used in marking walkways and exits. Temperature Resistance White electrical tape typically has good temperature resistance, making it suitable for both indoor and outdoor applications. It can withstand a range of temperatures without losing its adhesive properties or cracking. Common Uses of White Electrical Tape 🛠️ White electrical tape is incredibly versatile and can be used in a variety of settings. Here are some common applications: Electrical Insulation The primary use of white electrical tape is to insulate electrical wires and connections. It prevents accidental contact with live wires and reduces the risk of electrical shorts. Color-Coding Wires White electrical tape is excellent for color-coding electrical wires. This practice helps in identifying different wires and circuits, especially in complex electrical systems. It is often used alongside other colored tapes to create a comprehensive coding system. Labeling and Marking Due to its high visibility, white electrical tape is ideal for labeling and marking purposes. You can write on it with a marker to label wires, cables, and other components, making it easy to keep everything organized. Bundling Cables White electrical tape can be used to bundle multiple cables together, keeping them neat and preventing tangles. This is particularly useful in both professional settings like server rooms and home setups for managing entertainment systems. Temporary Repairs For quick fixes, white electrical tape can be used for temporary repairs. Whether it’s a frayed wire or a small crack in a plastic component, white electrical tape can provide a quick and visible solution until a more permanent fix is made. Arts and Crafts In the world of arts and crafts, white electrical tape is a popular choice. Its bright color and flexibility make it perfect for creating designs, securing materials, and adding decorative touches to various projects. How to Use White Electrical Tape: Best Practices 📝 To get the best results from white electrical tape, follow these best practices: Step 1: Clean the Surface The surface must be clean, dry, and free of dust and oil. A clean surface helps the tape adhere better and last longer. Step 2: Stretch and Wrap Stretch the tape slightly as you wrap it around the wire or component. This helps it conform to the shape and create a tight seal. Overlap each layer by about half the width of the tape for a secure and uniform insulation. Step 3: Apply Multiple Layers For enhanced insulation and durability, apply multiple layers of tape. Each additional layer increases the thickness and protection, making the insulation more robust. Step 4: Smooth Out Bubbles As you wrap the tape, smooth out any bubbles or wrinkles. This ensures a consistent and even application, which is crucial for effective insulation. Step 5: Inspect Regularly Regularly inspect the taped areas for any signs of wear, damage, or degradation. Replace the tape if it starts to peel or crack to maintain effective insulation. Safety Considerations ⚠️ Using white electrical tape requires some safety precautions to avoid accidents and ensure effective application: Turn Off Power Always turn off the power to the circuit you are working on before applying electrical tape. Use Quality Tape Choose high-quality electrical tape from reputable manufacturers. Low-quality tape may not provide adequate insulation and can degrade quickly. Avoid Overheating While white electrical tape has good temperature resistance, avoid exposing it to excessive heat for prolonged periods. High temperatures can cause the adhesive to weaken and the tape to lose its effectiveness. Store Properly Store electrical tape in a cool, dry place away from direct sunlight. Proper storage extends the shelf life and maintains the tape’s adhesive properties. Fun Facts About White Electrical Tape 🎉 Here are some fun and interesting facts about white electrical tape: Popular in Stage Productions White electrical tape is often used in theater and stage productions. It’s used to mark positions on stage, secure cables, and even create temporary labels on equipment. Widely Used in Sports

electric tape
Blog

Everything You Need to Know About Electrical Tape: A Comprehensive Guide 🛠️

Electrical tape, a common yet essential tool, is something almost everyone has encountered at some point. Whether you’re a DIY enthusiast, a professional electrician, or simply someone looking to fix a minor issue at home, electrical tape is likely to be part of your toolkit. But how much do you really know about this versatile adhesive? In this blog, we will delve into the ins and outs of electrical tape, covering its history, types, uses, and best practices. By the end of this read, you will have a newfound appreciation for this humble yet indispensable item. A Brief History 📜 The journey of electrical tape began in the early 20th century. Before its invention, electricians used friction tape, which was made from cloth impregnated with a rubber-based adhesive. While friction tape was effective, it had its downsides, such as a tendency to unravel and degrade over time. The invention of vinyl electrical tape in the 1940s revolutionized the industry. This new tape, developed by 3M, was more durable, flexible, and provided better insulation. Vinyl electrical tape quickly became the standard, and its use has only expanded since then. Types of Electrical Tape 🎨 Not all electrical tapes are created equal. There are different types of electrical tape, each designed for specific applications. Here are some of the most common ones: Vinyl Electrical Tape Vinyl electrical tape is the most widely used type. It is made from polyvinyl chloride (PVC) and is known for its flexibility, durability, and excellent insulation properties. It is available in various colors, which can be used for color-coding wires and components. Rubber Electrical Tape Rubber electrical tape, also known as self-fusing tape, is designed for high-voltage applications. It is non-adhesive and fuses to itself when stretched, creating a watertight seal. This makes it ideal for insulating splices and terminations in high-voltage systems. Glass Cloth Electrical Tape Glass cloth electrical tape is used in applications where high-temperature resistance is required. It is made from fiberglass cloth and can withstand temperatures up to 482°F (250°C). This tape is commonly used in aerospace, automotive, and industrial applications. Silicone Rubber Electrical Tape Silicone rubber electrical tape is another high-temperature tape, but it also offers excellent flexibility and resistance to moisture and chemicals. It is often used in applications where both high temperatures and harsh environmental conditions are present. Conductive Electrical Tape Conductive electrical tape is designed to conduct electricity. It is typically used for grounding and EMI/RFI shielding applications. This type of tape contains conductive elements like copper or aluminum. Uses of Electrical Tape 🛠️ Electrical tape is incredibly versatile and can be used in a variety of applications. Here are some of the most common uses of electrical tape in our daily life: Insulating Electrical Wires The primary use of electrical tape is to insulate electrical wires. It prevents electrical currents from accidentally coming into contact with other wires or conductive surfaces, which can cause short circuits, shocks, or fires. Color Coding Electrical tape comes in various colors, making it ideal for color-coding wires and components. This practice helps in identifying different wires and circuits, especially in complex electrical systems. Bundling Wires Electrical tape can be used to bundle wires together, keeping them organized and preventing tangles. This is particularly useful in automotive and electronics applications. Temporary Repairs While not a permanent solution, electrical tape can be used for temporary repairs. For instance, it can be used to fix damaged wire insulation until a more permanent repair can be made. Labeling Colored electrical tape can also be used for labeling purposes. By wrapping a piece of tape around a wire or component and writing on it, you can create easy-to-read labels. Sealing In some cases, electrical tape can be used to create a seal around connectors or other components to protect them from moisture, dust, and other contaminants. Best Practices for Using Electrical Tape 📝 To ensure that electrical tape is used safely and effectively, follow these best practices: Choose the Right Tape Select the appropriate type of electrical tape for your specific application. For example, use high-temperature tape for environments with high heat and rubber tape for high-voltage applications. Clean the Surface Before applying electrical tape, make sure the surface is clean and dry. This will ensure better adhesion and a more secure bond. Stretch and Wrap When applying vinyl electrical tape, stretch it slightly and wrap it tightly around the wire or component. This will ensure a snug fit and better insulation. Overlap the Tape Overlap each layer of tape by about half the width of the tape. This creates a stronger bond and better insulation. Avoid Overheating While electrical tape can withstand a fair amount of heat, it is not designed for continuous exposure to high temperatures. Avoid using it in applications where it will be exposed to excessive heat for long periods. Inspect Regularly Regularly inspect areas where electrical tape has been used, especially in critical applications. Replace the tape if it shows signs of wear, damage, or degradation. Common Myths and Misconceptions 🚫 There are several myths and misconceptions about electrical tape. Let’s find out some of the most common ones: Myth 1: Electrical Tape Can Be Used as a Permanent Solution While electrical tape is durable, it is not meant to be a permanent solution for serious electrical repairs. It is best used for temporary fixes and minor repairs. Myth 2: All Electrical Tapes Are the Same As we’ve discussed, there are different types of electrical tape designed for specific applications. Using the wrong type can lead to inadequate insulation and potential safety hazards. Myth 3: Electrical Tape Can Fix Any Electrical Problem Electrical tape is not a cure-all for electrical issues. It should not be used as a substitute for proper electrical work, such as replacing damaged wires or components. Safety Considerations ⚠️ Working with electrical tape requires some safety considerations to avoid accidents and injuries: Use Quality Tape Always use high-quality electrical tape from reputable manufacturers. Low-quality tape may not

Scroll to Top